How to Check Pulley Wheel Wear Before It Fails
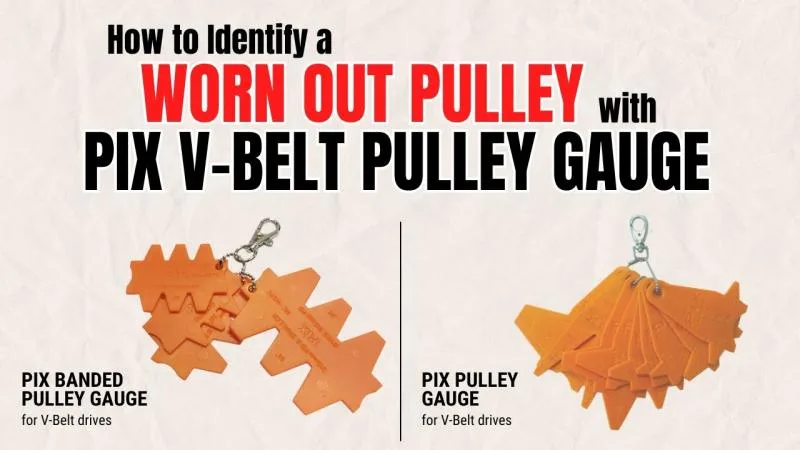
Learning how to check pulley wheel wear helps you catch drive issues before a thrown belt shuts down your equipment. Most people replace a snapped or squealing belt without ever looking at the metal sheave beneath it. This mistake leads to recurring belt failure, lost power, and wasted repair money.
Drive engineering standards from the Association for Rubber Products Manufacturers show that a mere 1/32-inch groove wear can cut belt lifespan by up to 50 percent. Checking your pulleys takes only a few minutes and basic diagnostic tools. Taking time to inspect the drive components properly keeps your equipment running smoothly and reliably.
Image source: Bing (Web (fair-use with source credit))
Quick Answer
To check pulley wheel wear, clean the grooves and inspect them for dishing. Place a sheave profile gauge into each groove. Check if daylight shows along the sidewalls.
Replace the pulley if the wear gap exceeds 1/32 inch. Spin the pulley by hand to check for bearing play.
Why Pulley Wear Goes Unnoticed (And Destroys Belts Early)
V-belt and serpentine drive systems rely on friction and precise geometry to transmit power. A standard V-belt transfers torque by wedging tightly against the angled sidewalls of the pulley groove. The belt should never touch the bottom of the channel.
As a drive runs over thousands of hours, abrasive dust and continuous friction grind away the pulley metal. This process slowly changes the angle of the groove walls. When the groove widens, the belt sinks deeper into the channel.
Once the belt bottoms out, it loses its wedging grip and begins to slip. Slipping generates intense heat, which quickly glazes and cracks the rubber. If you install a brand-new belt onto a worn sheave, the new belt will often fail in a fraction of its normal operating life.
Visual and Tactile Clues of a Damaged Pulley Wheel
You can spot many severe pulley issues before taking detailed measurements. A healthy pulley groove has straight, flat sidewalls with a consistent taper from top to bottom.
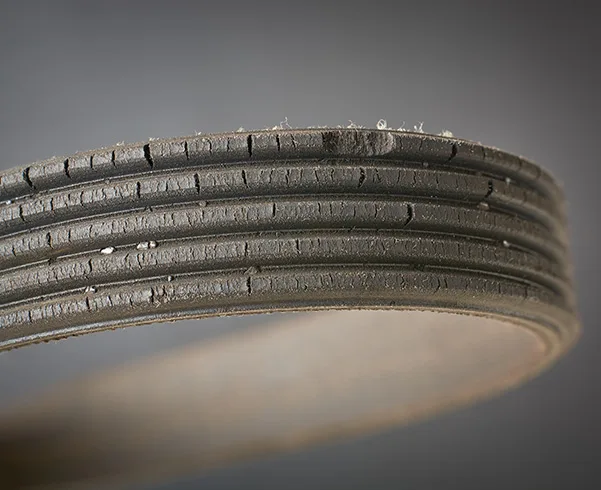
Image source: Bing (Web (fair-use with source credit))
Reading the Groove Profile: Dishing, Stepping, and Bottoming
Run your fingertip down the inner sidewall of the pulley groove. The surface should feel completely smooth and uniform. If you feel a distinct ridge, concave curve, or step, the metal has worn unevenly.
Look closely at the very bottom of the groove channel. In a healthy drive, this area remains dull or lightly oxidized because the belt never makes contact with it. If the bottom of the groove is polished to a bright, mirror shine, your belt is bottoming out and the pulley is condemned.
Spotting Bearing Failure, Flange Damage, and Surface Glazing
Examine the outer rims and flanges for chips, burrs, or cracks. Cast iron pulleys can chip if struck during maintenance, creating sharp edges that shred belts instantly.
Spin the pulley freely with the belt removed. It should rotate smoothly without grinding noises, clicking, or rough resistance. Any physical play or rocking motion on the shaft indicates worn bearings or a wallowed bore.
Step-by-Step Pulley Wear Inspection Guide
Checking your pulleys accurately requires a systematic approach. Follow these steps to evaluate groove condition, bearing health, and alignment across the drive.
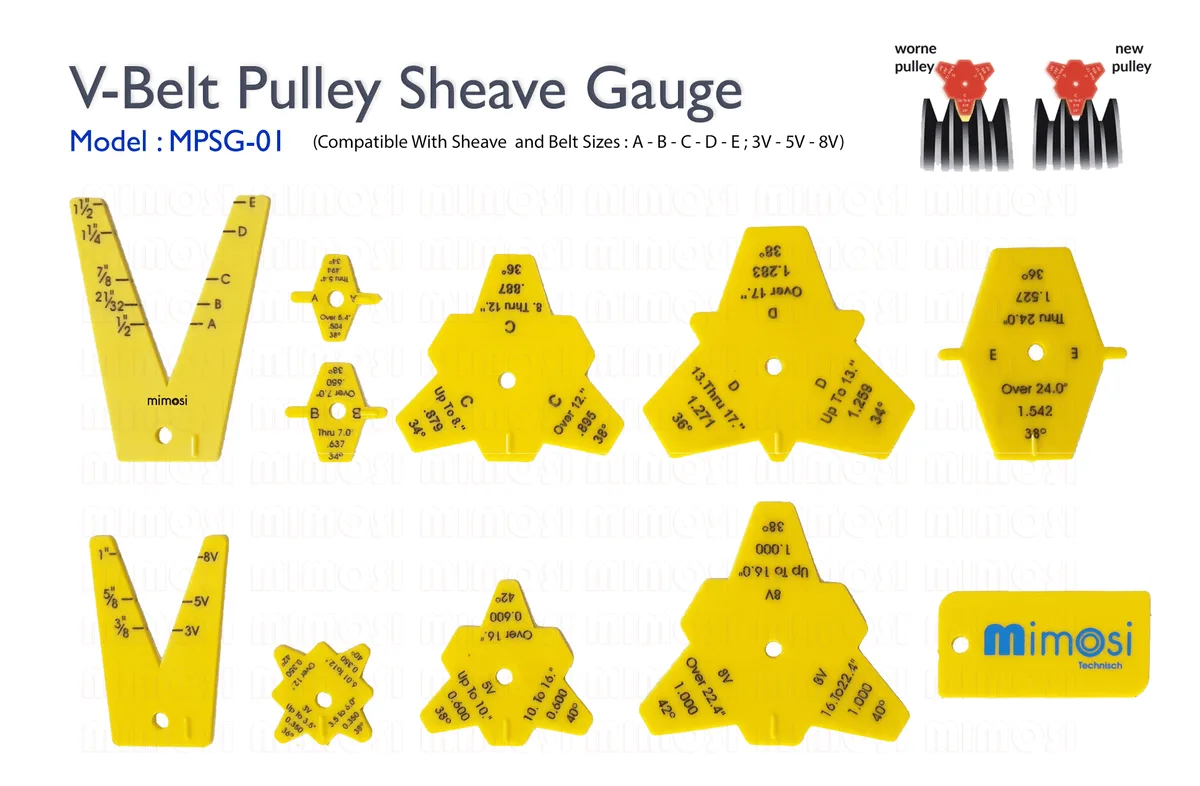
Image source: Bing (Web (fair-use with source credit))
Step 1: Safe Isolation and Belt Removal
Safety comes first on any mechanical power drive. Follow standard lockout and tagout procedures per OSHA safety regulations before touching any drive components.
Release the drive tensioner or motor base bolts to relieve belt tension. Slip the belt off the pulleys without prying it over the flanges with screwdrivers. Prying can bend sheet metal pulleys or nick cast iron grooves.
Step 2: Cleaning the Grooves and Visual Screening
Wipe the pulley grooves clean using a wire brush or shop rag with a mild degreaser. Remove all packed rubber dust, rust scale, and hardened grease buildup.
Shine a bright inspection light directly into the channels. Look for uneven polishing, scoring lines, or micro-cracking across the drive faces.
Step 3: Checking Profile Tolerances with a Sheave Gauge
Select the correct plastic or metal sheave gauge blade matching your belt profile (such as A, B, 3V, 5V, or multi-rib serpentine). Press the gauge firmly and squarely into the pulley groove.
Look for daylight between the gauge template and the pulley sidewall. As of 2026, standard maintenance guidelines specify that an air gap wider than 1/32 inch (0.8 mm) requires immediate sheave replacement.
Step 4: Measuring Radial Runout and Axial Bearing Play
Mount a dial indicator on a rigid magnetic base attached to the machine frame. Place the indicator tip against the outer diameter rim of the pulley.
Rotate the pulley slowly by hand through 360 degrees. If the total indicator reading shows radial wobble greater than 0.010 to 0.015 inches, the pulley is bent, out-of-round, or improperly seated on its bushing.
       SHEAVE GAUGE INSPECTION
   +-------------------------------+
   |        Sheave Gauge           |
   \       /               \       /
    \     /                 \  *  /  <-- Air gap > 1/32"
     \   /                   \   /       indicates wear
      \_/                     \_/
   [ Normal Profile ]     [ Worn / Cupped ]
Step 5: Checking Pulley Alignment Across the Drive System
Place a precision straightedge across the machined faces of both the driver and driven pulleys. The straightedge should make contact at four distinct points across both rims.
Alternatively, use a magnetic laser alignment tool mounted in the groove. Angular or parallel misalignment forces the belt against one side of the groove, causing rapid, lopsided wear.
Critical Wear Limits: When to Resurface vs. Replace
Small pulleys on standard industrial motors or automotive accessory drives are disposable wear items. Large industrial sheaves with split-taper or QD bushings can sometimes be re-grooved if sufficient rim thickness remains, but replacement is usually more cost-effective.
| Inspection Check | Normal Condition | Maximum Wear Limit | Required Action |
|---|---|---|---|
| Sidewall Gap (Gauge) | Flush contact (0 gap) | 1/32 in (0.8 mm) daylight | Replace pulley |
| Groove Bottom | Dull, unpolished finish | Shiny / polished surface | Replace pulley and belt |
| Radial Runout | < 0.005 in (0.13 mm) | > 0.015 in (0.38 mm) | Re-seat or replace |
| Axial Shaft Play | Zero detectable wobble | > 0.005 in (0.13 mm) | Replace bearing / bushing |
| Belt Ride Height | Flush to 1/16 in above rim | Sinking below rim edge | Replace pulley |
Sheave and Pulley Wear Tolerance Benchmarks
When measuring belt ride height, a new classic V-belt should ride flush with or slightly above the outer rim of the sheave. If a new belt sinks down into the groove, the groove walls have opened up beyond serviceable limits.
For multi-rib serpentine pulleys, check the rib tips. The peaks of the metal ribs should be flat or slightly rounded. If the tips have worn down to razor-sharp points, the pulley must be replaced.
Common Wear Patterns and What Causes Them
Understanding why a pulley wore out helps you fix underlying issues before the replacement pulley suffers the same fate.
Abrasive Dust, Misalignment, and Overtensioning Scenarios
Dust and grit act like liquid sandpaper inside the drive channel. In dusty agricultural or sawmill settings, standard cast iron sheaves wear down rapidly. Upgrading to ductile iron or hardened steel extends service life significantly.
Misalignment causes distinct, one-sided groove wear. When pulleys sit out of square, the belt enters the channel at an angle, grinding away the top edge of one sidewall and the bottom of the opposite sidewall.
Overtensioning creates severe bearing side-load and generates excessive frictional heat. This extra load deforms composite idler pulleys, accelerates metal galling, and causes premature bearing failure.
Mistakes to Avoid When Checking and Replacing Pulleys
Skipping a thorough pulley inspection often leads to expensive repeat repairs. Avoid these common mistakes when evaluating and servicing drive components:
- Using belt dressing sprays to silence noise. Spray compounds provide temporary grip, but they attract abrasive dirt and chemically degrade rubber belts.
- Replacing belts without checking the grooves. Putting a fresh belt onto a dished pulley guarantees early belt failure and wasted money.
- Eyeballing groove wear without a profile gauge. Human vision cannot reliably detect a 1/32-inch taper difference across a deep channel.
- Prying belts over pulley rims. Forcing a belt into position with a pry bar bends sheet metal flanges and shears internal belt cords.
- Replacing only one pulley in a multi-groove drive. Mismatched groove wear across parallel channels forces individual belts to run at different speeds, destroying the drive set.
Frequently Asked Questions About Pulley Wear
How often should you check pulley wheel wear?
Check your pulleys during every scheduled belt replacement, or every 50,000 miles on automotive accessory drives. In dusty industrial and agricultural settings, inspect sheaves every 1,000 operating hours. Catching sidewall wear early prevents unexpected belt snaps and production downtime.
Can you fix a worn pulley without replacing it?
Most standard automotive and industrial pulleys are non-serviceable wear parts that require full replacement. Large, heavy cast iron industrial sheaves can occasionally be machined and re-grooved by a machine shop. However, buying a new replacement sheave is almost always faster and more economical.
What does a failing idler pulley sound like?
A failing idler pulley typically produces a high-pitched squeal, chirping noise, or low grinding rumble. Squeaking often indicates a glazed pulley surface or belt slip. A continuous scraping or grinding roar points directly to dry, worn internal ball bearings.
How do you know if a serpentine pulley is worn?
Check the peaks of the grooves across the multi-rib profile. Serpentine pulley ribs should have flat or slightly rounded tips. If the tips have worn down to sharp, pointed knife edges, or if metal debris coats the valleys, replace the pulley.
Why does my new belt squeak on the old pulley?
A new belt squeaks on an old pulley because the worn groove sidewalls cannot grip the belt properly. The belt drops to the bottom of the channel, loses traction, and slips under load. This friction generates continuous chirping and rapidly glazes the new belt.

Similar Posts