How to Test Reformer Spring Tension: Step-by-Step
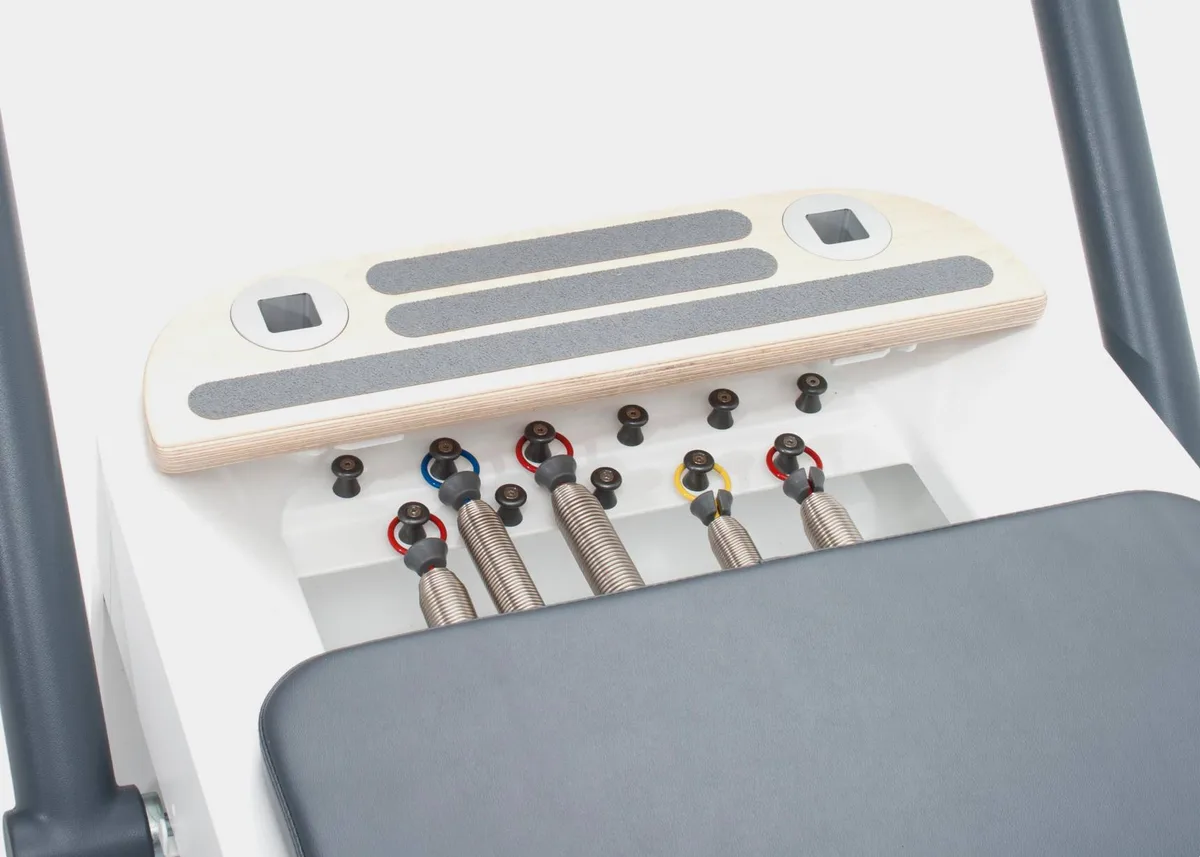
Pilates equipment maintenance is essential for safety, and knowing how to test reformer spring tension keeps your studio running smoothly. Weak or uneven springs disrupt client alignment and can snap during high-load exercises. A simple calibration routine identifies metal fatigue before sudden mechanical failure occurs.
Per ASTM International standards for mechanical extension springs, cycle fatigue alters wire tensile strength long before visible deformity shows. Manufacturer maintenance guidelines recommend formal tension testing every six months to verify resistance curves. You can easily benchmark your equipment with a standard protocol and a few affordable tools.
Image source: Web (Bing) / pilates.com (Web image (fair-use with source credit))
Quick Answer
Learn how to test reformer spring tension using a digital hanging scale. First, inspect resting coils for daylight gaps and hook wear. Next, attach the scale to the spring ring.
Pull the scale to specific carriage positions. Replace any spring that shows over ten percent force variance.
The High Stakes of Reformer Spring Fatigue
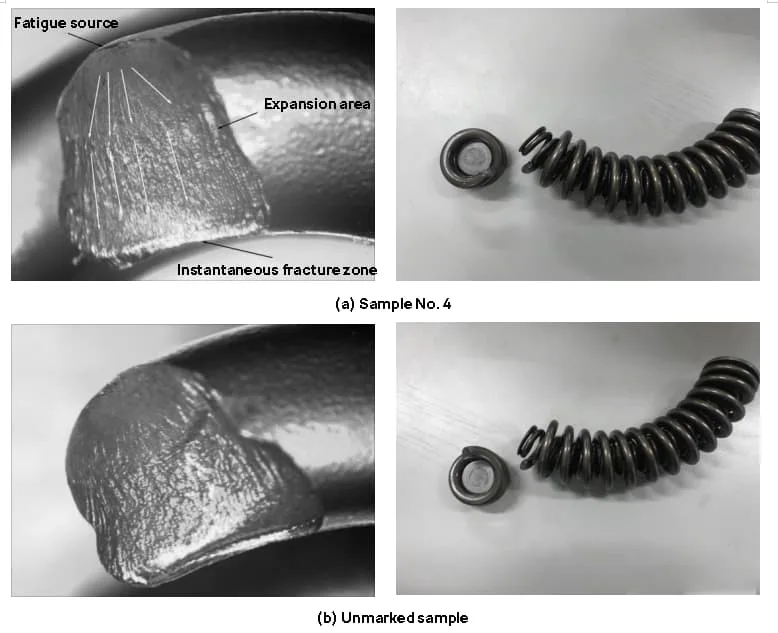
Image source: Bing (Web (fair-use with source credit))
Why "Subjective Feel" Is a Dangerous Metric
Instructors often test springs by pushing the carriage with their hands. This tactile check is unreliable. Your body adapts to gradual tension loss over months.
A spring that has lost fifteen percent of its original pull resistance will feel normal to daily users.
Subjective checks also miss asymmetric resistance. When twin springs degrade at different rates, the carriage pulls unevenly across the guide rails. This creates subtle rotational torque on a client's pelvis and lumbar spine during bilateral exercises like footwork.
Anatomy of a Failing Spring: Micro-Cracks, Gapping, and Rust
Most commercial reformer springs are wound from high-tensile carbon steel music wire. Every extension cycle creates internal friction and microscopic stress concentrations. Failure rarely starts in the center coils.
It usually begins at the transition neck where the coil tapers into the attachment hook.
Look for these physical warning signs during your checks:
- Coil gapping: Daylight visible between resting coils indicates permanent structural stretch.
- Neck elongation: The tapered wire near the hook pulls out of alignment.
- Plating separation: Flaking nickel or chrome exposes raw steel to sweat and moisture.
- Pitting and rust: Oxidation eats into the wire diameter and creates sudden shear points.
Baseline Spring Specs and Resistance Curves Across Major Brands
Balanced Body, Merrithew, Peak, and Gratz Resistance Profiles
Every commercial manufacturer tunes their spring wire diameter, coil count, and resting length to match specific resistance curves. Mixing brands or guessing spring weights undermines exercise programming.
| Manufacturer | Color Code / Designation | Approximate Max Resistance | Primary Studio Application |
|---|---|---|---|
| Balanced Body | Yellow (Very Light) | ~15 lbs (6.8 kg) | Arm work, rehabilitation, light support |
| Blue (Light) | ~20 lbs (9.1 kg) | Core stability, light carriage load | |
| Red (Medium) | ~31 lbs (14.1 kg) | Standard full-resistance baseline | |
| Green (Heavy) | ~44 lbs (20.0 kg) | Heavy leg press, high-load stability | |
| Merrithew | White (25%) / Yellow (50%) | Light to half-tension | Precision clinical work, scapular stability |
| Blue (75%) / Red (100%) | Standard working range | Core integration, general studio classes | |
| Black (125%) | Heavy resistance | High-intensity athletic conditioning | |
| Peak Pilates | Yellow (Light) / Blue (Med) / Red (Hvy) | Tiered linear resistance | Traditional progression series |
| Gratz | Uncoated Raw Steel | Heavy uniform tension | Authentic classical Pilates work |
Elastic Limit vs. Plastic Deformation in Commercial Spring Wire
Springs operate under Hooke's Law, where force expands linearly with displacement. As long as the steel stays within its elastic range, it returns to its exact starting length.
When a spring is overstretched or fatigued from thousands of repetitions, it enters plastic deformation. The internal molecular bonds yield permanently. Once a spring reaches this state, tension curves drop sharply and cannot be restored.
Required Equipment for Calibrated Spring Testing
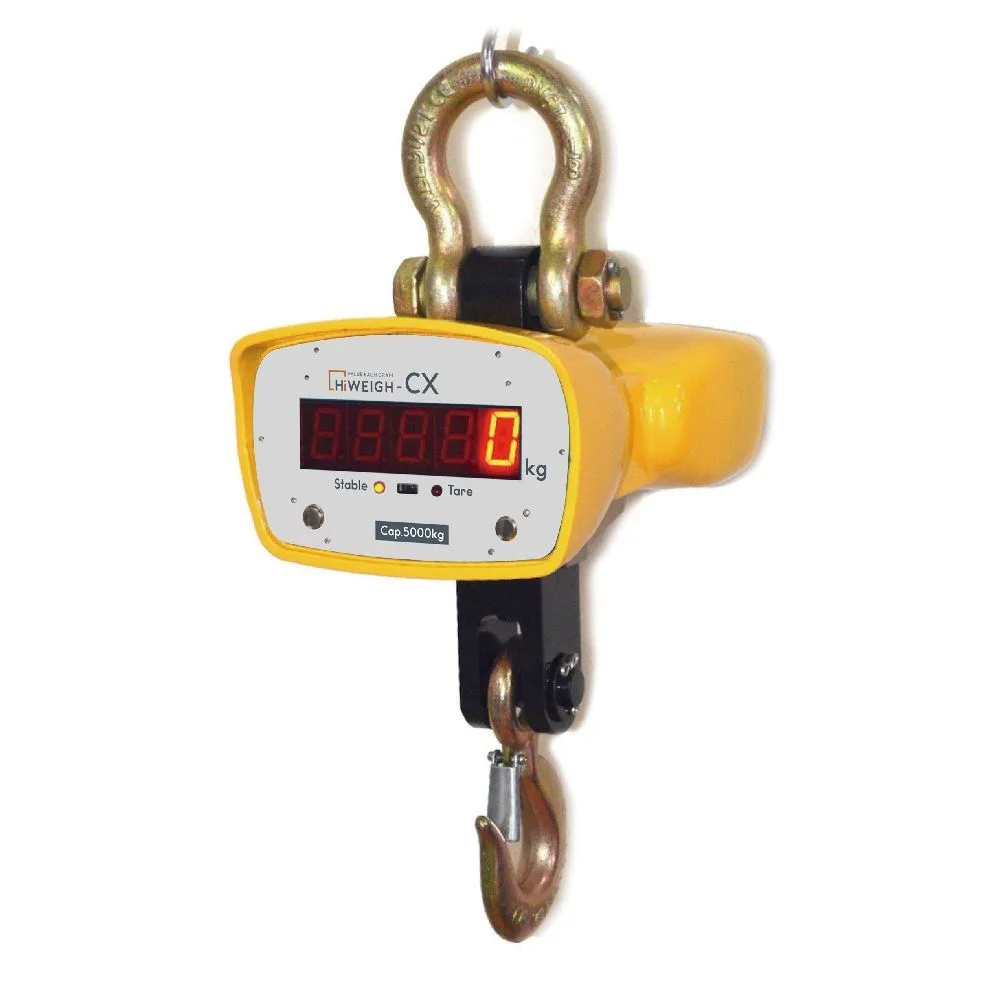
Image source: Web (Bing) / hiweigh.en.made-in-china.com (Web image (fair-use with source credit))
The Diagnostic Toolset (Digital Pull Scale to High-Intensity Light)
You do not need expensive laboratory machinery to accurately test reformer springs. A reliable field kit requires only four items:
- Digital hanging scale: A 50-pound to 100-pound capacity digital luggage or fish scale with a peak-hold feature.
- Steel tape measure: A standard locking tape measure to record precise carriage extension distances.
- High-intensity LED penlight: Essential for spotting micro-cracks inside coil tapers.
- White cotton inspection glove: Running a glove over the wire snags on burrs, flakes, and cracks that eyes miss.
Setting Up a Repeatable Zero-Point Baseline on Your Reformer Frame
Consistent measurements require an identical starting point for every test. Place the reformer carriage firmly against its resting rubber bumpers.
Lock the footbar into its standard vertical position. Place a strip of painter's tape along the wooden or aluminum side rail. Mark two reference points: 12 inches (30.5 cm) and 24 inches (61 cm) of carriage travel from home position.
The 4-Step Testing Protocol for Reformer Spring Tension
Step 1: Visual and Tactile Inspection (The Daylight and Burr Test)
Disconnect all springs from the gear bar so they hang completely relaxed. Shine your LED penlight along the full length of each spring body.
Check for light passing between resting coils. Healthy extension springs have zero resting clearance. Put on the white cotton glove and slide your hand along the entire coil surface.
Any snagging thread identifies wire splitting or peeling nickel plating.
Step 2: Zero-Load Neutral Slack and Pre-Tension Verification
Reattach one spring to the standard gear bar position while keeping the carriage resting against the stoppers. Observe the spring hook attachment point.
The spring should sit snugly against the eyehook or gear bar peg without loose dangling or sagging. If the spring body droops under its own weight at rest, the initial tension is exhausted.
Step 3: Calibrated Pull-Force Testing with a Digital Dynamometer
Hook the carabiner of your digital scale directly into the carriage eyelet or the free end of the spring. Zero out the scale tare weight.
- Pull the scale smoothly along the center line of the carriage rails.
- Stop exactly at your 12-inch reference mark and record the pound-force reading.
- Continue pulling smoothly to the 24-inch mark and record the maximum reading.
- Release slowly and repeat the process twice for each spring to establish an average value.
Step 4: Bilateral Pair Matching and Left-to-Right Variance Analysis
Test matching spring colors together. Compare the pull-force numbers between all identical springs on the same frame.
Log the numbers in your studio maintenance record. If your primary red spring pulls at 28 pounds at 24 inches of extension, its matching twin should read within a narrow, balanced margin.
Interpreting Test Data: Safe Tolerances vs. Immediate Retirement
The 10% Variance Rule and Structural Failure Indicators
As of 2026, leading fitness safety protocols and guidelines from the National Pilates Certification Program recommend retiring any spring that deviates by more than 10% from its original factory rating or its matched pair.
- 0% to 5% Variance: Excellent condition. The spring is within normal operating tolerance.
- 6% to 10% Variance: Acceptable for general classes. Re-test this spring within 60 days.
- Over 10% Variance: Immediate retirement. Remove the spring from service right away.
- Visible Coil Separation: Immediate retirement, regardless of measured scale weight.
Wear Limits on Hooks, C-Rings, and Eyelets
Spring failure frequently occurs at the connection hardware rather than the wire body. Inspect the inner curve of the attachment hook where metal rubs against metal.
Use the 25% wear rule. If continuous friction has worn away 25% or more of the original hook wire thickness, retire the spring immediately. Grooved hooks can snap cleanly under standard client loads.
Studio Maintenance Schedule, Replacement Windows, and Safety Protocols
Usage Hour Baselines vs. Calendar Age Replacement Timelines
Studio owners should track both operating hours and calendar age when planning spring replacements. High-volume commercial studios accumulate wear much faster than home setups.
- High-Volume Studios (25+ client hours weekly per frame): Replace all springs every 12 to 24 months, or roughly every 3,000 class hours.
- Clinical and Boutique Studios (10 to 20 hours weekly): Replace springs every 24 to 36 months.
- Home Users (under 5 hours weekly): Replace springs every 3 to 5 years, provided annual pull tests show normal tension.
Always replace springs in complete matching sets. Swapping only one worn spring creates uneven resistance across the carriage.
Safe Decommissioning and Studio Liability Documentation
Never throw expired reformer springs into regular trash without disabling them. Someone could retrieve a damaged spring and install it on another machine.
Use heavy bolt cutters to cut through the end coils before discarding them. This makes the spring impossible to hook up.
Keep a detailed logbook beside each reformer. Record the installation date, the serial numbers, quarterly pull-force scale readings, and the decommissioning date. Clear maintenance records protect your business if an insurance claim or equipment audit occurs.
Frequently Asked Questions About Reformer Spring Safety and Testing
How often should you test reformer spring tension?
Commercial studios should run pull-force scale tests every six months. Conduct quick visual checks for daylight gaps every week during regular frame wipe-downs. Home users can test spring tension once a year.
Can you fix a loose or stretched reformer spring?
No, you cannot fix a stretched reformer spring. Once the internal steel exceeds its elastic limit, the structural integrity is permanently compromised. Attempting to bend or compress the coils creates dangerous weak points that cause sudden failure.
Why do identical colored springs pull with different weights?
Springs change resistance as steel fatigues from uneven usage patterns. In many studios, instructors favor the center spring position. That middle spring stretches more often than the outside springs, creating a distinct tension difference over time.
What causes reformer springs to squeak during use?
Squeaking usually happens when metal hooks rub dry against gear bar eyelets or carriage frames. Clean the contact points and apply a drop of silicone spray or dry PTFE lubricant to the pivot hooks. Never spray wet lubricants directly onto the coils.
Is it safe to use third-party replacement springs on my reformer?
Using third-party springs is not recommended for commercial or clinical equipment. Generic springs often lack the exact wire alloy, coil taper, and load ratings engineered by the original equipment manufacturer. Mismatched springs void equipment warranties and create unpredictable resistance curves.