Why Your Reformer Springs Feel Too Strong & How to Fix It
If you are wondering why does my reformer spring feel too strong, you are not alone. A setting that felt smooth yesterday can suddenly feel impossibly heavy today. Most of the time, the issue is not a sudden loss of muscle strength.
Mechanical variables often explain the sudden change in resistance. A standard full-tension spring yields roughly 30 to 35 pounds of resistance at full extension, but setup errors can double that starting load. Industry maintenance data as of 2026 shows that improper gearbar positioning and unaddressed carriage drag account for most sudden resistance spikes.
Image source: Bing (Web (fair-use with source credit))
Quick Answer
A reformer spring feels too strong due to mechanical setup errors or brand color differences. Pre-tension from an incorrect gearbar position creates heavy resistance before the carriage moves. Dirty rail tracks and worn carriage wheels also add artificial drag.
In some exercises, lighter springs actually feel harder because they provide less stability support.
Why That Reformer Spring Feels Suddenly Unmanageable
Reformer springs behave differently than standard free weights. Dumbbells provide a constant gravitational load throughout a lift. Springs, by contrast, follow Hooke's law, meaning resistance increases linearly as the coil stretches.
The further the carriage travels from the home stopper, the heavier the movement becomes. If your starting position forces an early coil stretch, you hit peak resistance much earlier in your range of motion. This makes ordinary repetitions feel brutally heavy.
Leverage also plays a massive role in perceived resistance. When your arms or legs reach full extension, your mechanical advantage drops. If that moment coincides with maximum spring elongation, the resistance curve spikes sharply against your joints.
Brand-by-Brand Spring Tension: You Might Be Pulling More Weight Than You Think
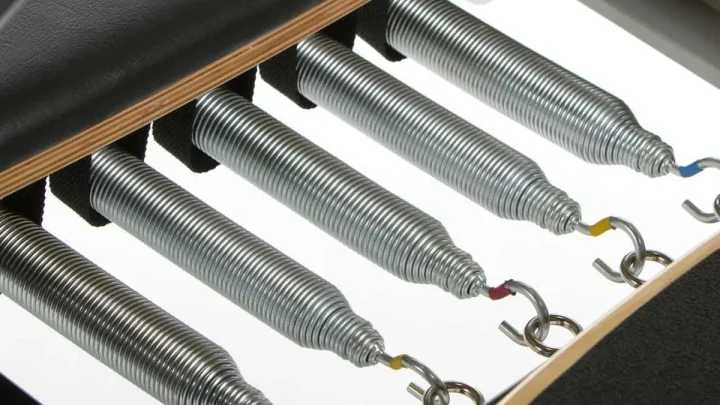
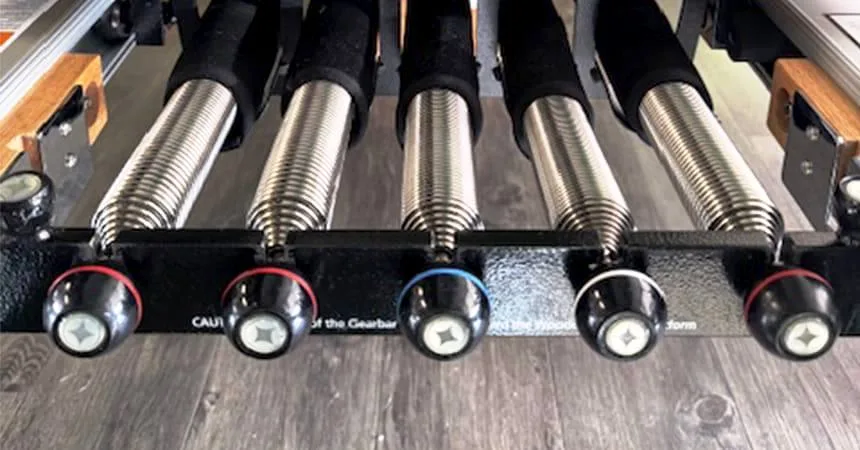
A common reason springs feel unexpectedly heavy is brand variation. Pilates studios use different equipment manufacturers, and their color-coding systems do not match. A blue spring on one frame can feel twice as heavy as a blue spring on another.
Technical specifications from manufacturers like Balanced Body show clear differences across standard spring ratings:
| Manufacturer | Spring Color | Resistance Level | Relative Value |
|---|---|---|---|
| Balanced Body | Yellow | Very Light | 25% |
| Balanced Body | Blue | Light | 50% |
| Balanced Body | Red | Medium / Full | 100% |
| Balanced Body | Green | Heavy | 125% |
| Merrithew (STOTT) | Yellow | Extra-Light | 25% |
| Merrithew (STOTT) | White | Light | 50% |
| Merrithew (STOTT) | Blue | Medium | 75% |
| Merrithew (STOTT) | Red | Full | 100% |
| Merrithew (STOTT) | Black | Plus (Heavy) | 125% |
| Peak Pilates | Yellow | Light | 50% |
| Peak Pilates | Blue | Medium | 75% |
| Peak Pilates | Red | Heavy | 100% |
If you switch from a Balanced Body machine to a Merrithew reformer, dropping to a blue spring actually increases your resistance from 50% to 75%. That 25% difference creates immediate strain on smaller muscle groups like the deltoids or rotator cuff.
The Mechanics: Pre-Tension, Gearbars, and Carriage Positioning
Pre-tension occurs when a spring remains stretched while the carriage sits parked against the frame stoppers. In a zero-tension setup, the spring coils rest together loosely with no pull.
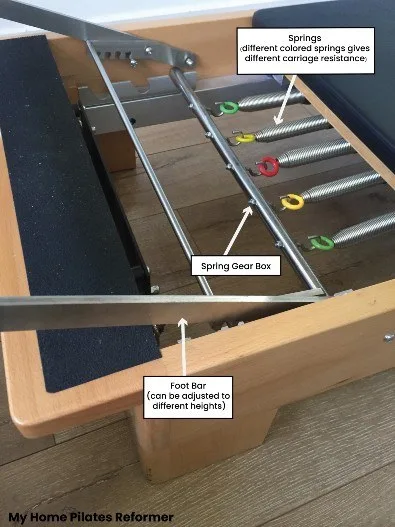
Image source: Bing (Web (fair-use with source credit))
When a spring has pre-tension, you must overcome an immediate 5 to 15 pounds of resistance the instant the carriage moves. This happens when the gearbar sits in a forward slot while the carriage stoppers remain set for a rear position.
Your starting hip and knee angles determine joint leverage. If the gearbar is positioned too close to the footbar, taller users end up with extreme hip flexion at the bottom of footwork. This poor angle drastically reduces quad and glute power, making standard spring loads feel unmovable.
The Assistance Paradox: Why Lighter Springs Often Feel Harder
In Pilates, springs serve two distinct functions. They provide resistance to push against, or they provide support to hold your bodyweight. Misunderstanding this balance makes light springs feel deceptively heavy.
In exercises like the Long Stretch (plank) or Elephant, heavier springs hold the carriage stable beneath you. If you drop down to a single light spring, your abdominal wall, hip flexors, and shoulder stabilizers must support your entire bodyweight.
If your core fails to stabilize the platform, your hip flexors grip and burn. This creates the sensation of heavy resistance when the true issue is a lack of mechanical support. Adding a spring often relieves the strain instantly.
Diagnostic Workflow: Pinpointing Exactly Why Your Springs Feel Too Heavy
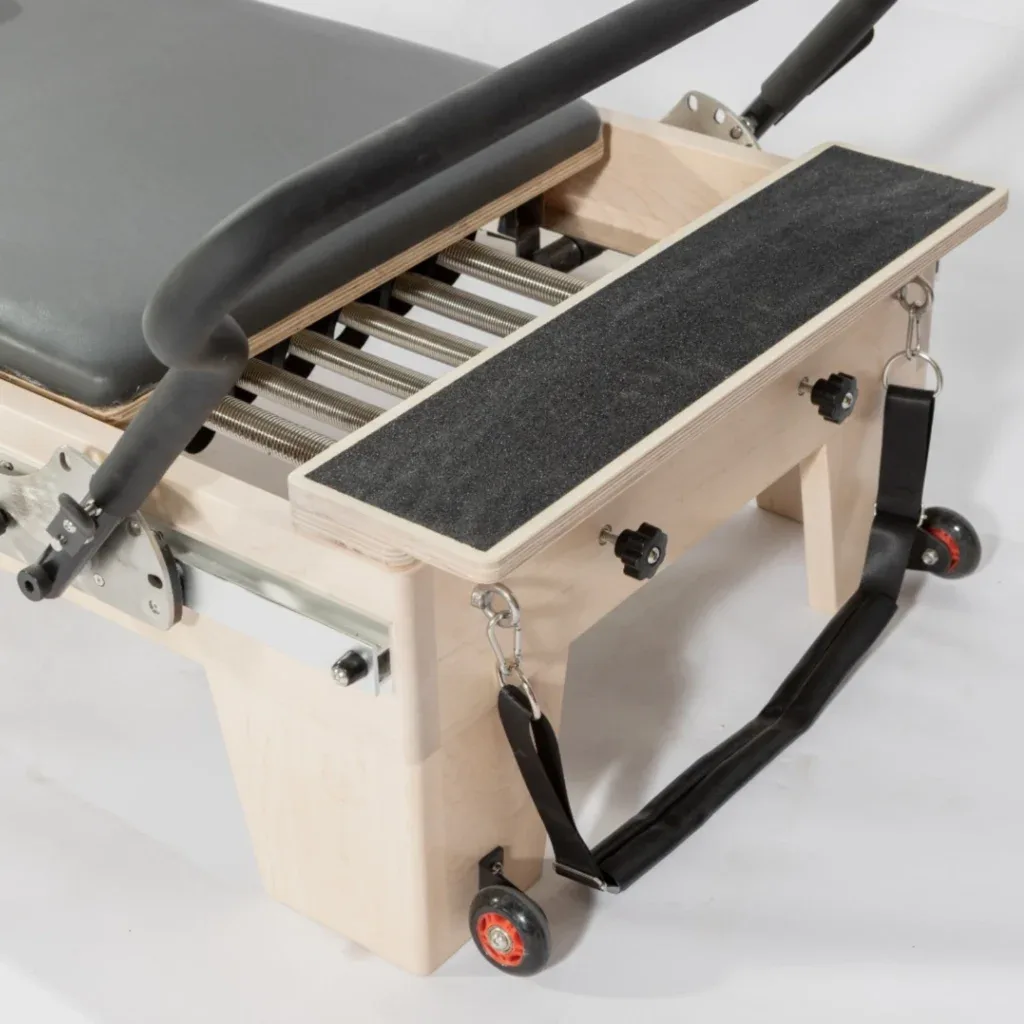
Image source: Bing (Web (fair-use with source credit))
Use this step-by-step diagnostic workflow to isolate the mechanical or biomechanical cause of your heavy spring tension.
Step 1: Check Carriage Rest and Gear Position
Look at the spring hooks while the carriage rests against the front stoppers. If the spring coils are visibly separated or under tension, your gearbar and stoppers are misaligned. Shift the gearbar outward by one position until the springs sit fully relaxed at rest.
Step 2: Test for Track and Wheel Drag
Disconnect all springs from the gear plate. Gently push the carriage with one hand down the length of the rails. If the carriage catches, drags, or stops abruptly, your issue is track friction rather than spring tension.
Clean aluminum residue or hair off the wheel bearings.
Step 3: Audit Exercise Mechanics and Joint Angles
Determine whether the exercise uses the springs for load or for bodyweight assistance. If you are doing plank-based movements, add a half spring to provide carriage stability. If you are doing leg work, lower the footbar or shift the carriage gear back to open up your hip angles.
Step 4: Verify Spring Anchor Placement
Check whether your reformer uses dual-tier hook points. Attaching a spring to a lower bracket increases resting stretch and creates higher resistance. Move the spring eyelet to the upper tier for standard resistance curves.
Common Setup Mistakes That Artificially Spike Resistance
Small mechanical oversights can dramatically change the feel of your reformer. When resistance spikes unexpectedly, one of these common setup errors is usually responsible.
- Mismatched Stopper and Gear Settings: Placing the gearbar in position one while the carriage stopper sits in position two creates instant resting tension. The springs never fully relax.
- Incorrect Lower-Tier Hooking: Many modern reformers feature dual-tier spring hooks. Attaching a spring to the lower tier increases the resting coil extension, which adds roughly 10% to 20% more resistance across the entire stroke.
- Uneven Rope Adjustments: If your reformer ropes are shortened unevenly, one side of your body engages earlier. This causes asymmetric carriage tracking and makes the initial press feel unusually heavy.
- Coil Oxidation and Age: Over time, steel coils accumulate dust, micro-rust, and metal fatigue. Older springs develop internal friction between coils, creating a sticky, heavy pull during movement turnarounds.
Step-by-Step Fixes to Calibrate Your Reformer Tension
Calibrating your reformer takes only a few minutes. Follow these practical steps to restore the proper resistance curve on your machine.
- Reset to Zero Pre-Tension: Move the carriage all the way forward against the frame bumpers. Look down at the spring eyelets. If the hooks pull tightly against the pins, move your gearbar back one slot until the coils rest together with zero tension.
- Adjust Footbar Height to Your Hip Mobility: A high footbar forces deep hip flexion for taller users, which robs you of leg drive. Lower the footbar by one notch to open your hip angle to roughly 90 degrees at the starting position.
- Wipe Down the Guide Rails: Clean the carriage channels with a dry microfiber cloth and a light mist of rubbing alcohol. Removing built-up wheel residue eliminates mechanical drag instantly.
- Rebalance the Spring Combination: If a full red spring feels too heavy for upper-body work, drop to a single blue spring. For contemporary reformers without half-step springs, adjust your distance from the pulleys to modify leverage.
According to safety guidelines from the Pilates Method Alliance, you should inspect spring coils and hooks monthly. Check for visible gaps between coils at rest, and replace any spring that shows signs of uneven spacing or metal fatigue.
Frequently Asked Questions About Reformer Spring Resistance
Why does one spring feel harder than three springs on certain exercises?
On bodyweight-support exercises like the Elephant or Long Stretch, heavy springs keep the carriage stable beneath you. Dropping to a single light spring removes that platform stability. Your core and hip flexors must hold your bodyweight against movement, which feels significantly more demanding.
How often should Pilates reformer springs be replaced?
Commercial studios should replace springs every two years under high-volume use. For home reformers, replacing springs every three to five years is standard practice. Replace any spring immediately if you notice coil separation, bending, or audible creaking during carriage glide.
Can dirty carriage tracks make my reformer springs feel heavier?
Yes. Dust, hair, and oxidized aluminum shavings accumulate in the carriage channels over time. This debris creates rolling resistance against the polyurethane wheels, mimicking the feel of a heavier spring.
Cleaning the tracks with rubbing alcohol restores smooth, low-drag glide.
What causes a spring to feel harder at the very start of a movement?
A heavy start indicates spring pre-tension. If the gearbar sits too far forward relative to the carriage stoppers, the spring begins stretching before you push. The spring should hang loose with zero preload when the carriage rests against the stopper.
How do I know if my footbar is set at the wrong height?
Your footbar is too high if your knees compress tightly against your chest in the starting position of Footwork. This sharp angle restricts blood flow and reduces quad recruitment. Lower the bar until your knees sit comfortably at a 90-degree angle.